UE5 源码引擎构建&UGS部署与搭建
本文是学习部署源码引擎构建并使用UGS作为Perforce同步UE项目的图形化前端的笔记(持续记录更新中)...
一、设置Visual Studio 环境
设置虚幻引擎到Visual Studio工作流前
下列表格列出了已集成二进制版虚幻引擎的Visual Studio版本。
| 虚幻引擎版本 | Visual Studio版本 |
|---|---|
| 4.25或更高版本 | VS 2019 (Default) |
| 4.22或更高版本 | VS 2017 / VS 2019 |
| 4.15或更高版本 | VS 2017 |
| 4.10 - 4.14 | VS 2015 |
| 4.2 - 4.9 | VS 2013 |
推荐vs2022
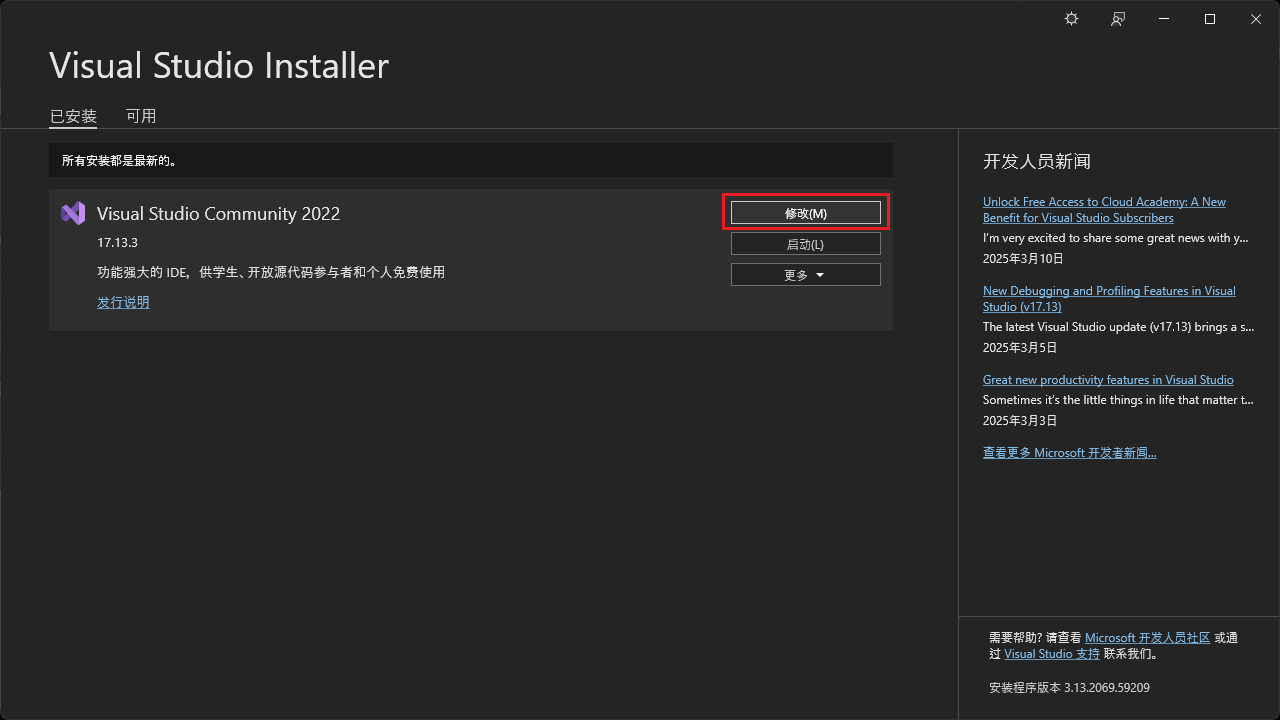
运行虚幻引擎必备条件安装程序
在Epic启动器安装或从GitHub复制虚幻引擎时,将自动运行虚幻引擎必备条件安装程序。若通过Perforce进行安装或同步虚幻引擎,则需要手动运行必备条件安装程序。
运行本地编译的虚幻引擎工具前必须进行此操作。
安装程序位于[虚幻引擎根目录]\Engine\Extras\Redist\en-us\。
新安装Visual Studio时的选项
如果你是初次安装Visual Studio,请确保启用下列选项。
C++工具
要在安装Visual Studio时添加C++工具,请确保在 工作量(Workloads) 下选择 用C++开发游戏(Game development with C++),并使用以下选项:
- C++ profiling tools
- C++ AddressSanitizer (optional)
- Windows 10 SDK (10.0.18362 or Newer)
包含虚幻引擎安装程序
要在安装Visual Studio时包含虚幻引擎的安装程序,在右侧的 摘要(Summary) 工具栏中展开 用C++开发游戏(Game development with C++)。
在可选(Optional) 下,确保勾选 虚幻引擎安装程序(Unreal Engine installer) 以便启用它。
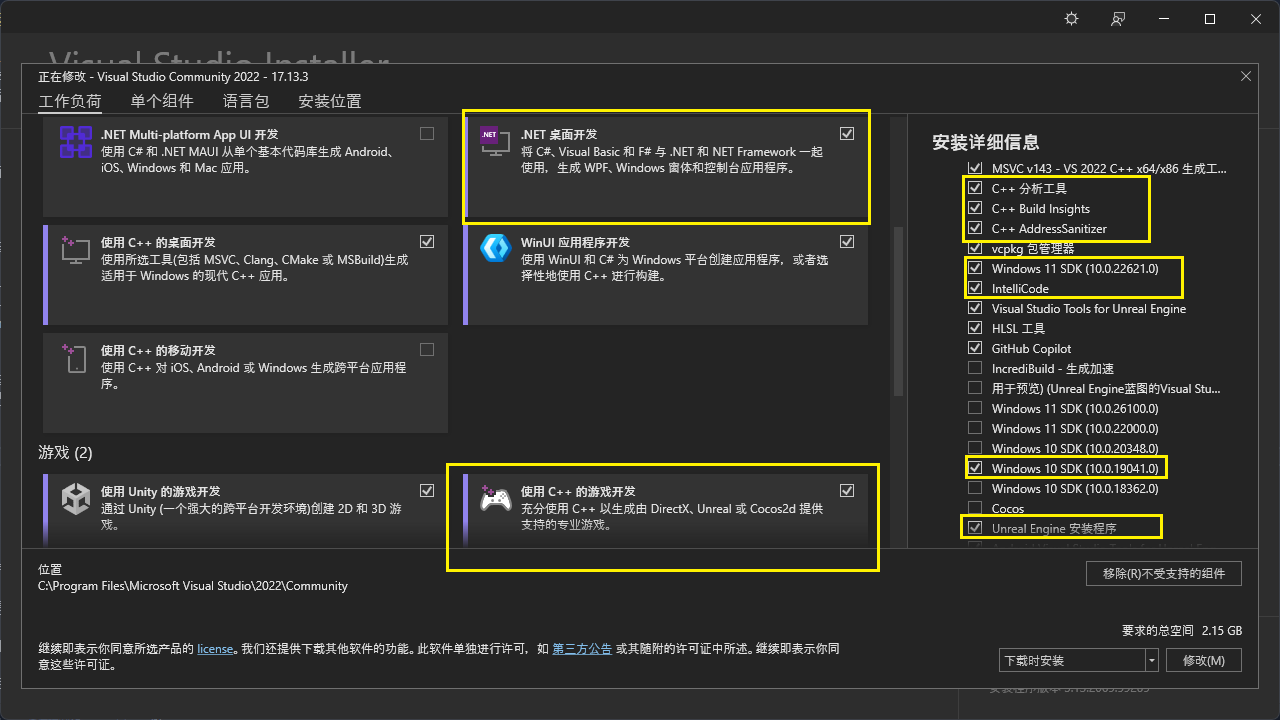
如果你PC是win11,并且使用VS2022可能会如同我这般基本勾选上了,只缺一个
win10 SDK(10.0.19041),
一起安装可同时兼容 Win10 和 Win11 系统,以应对不同的开发情况。
更多的推荐设置麻烦跳转官网查看 设置Visual Studio以使用虚幻引擎的提示、技巧和技术
二、下载虚幻引擎源代码
如要访问https://github.com/EpicGames/UnrealEngine上的仓库,你必须满足以下条件:
- 已经是虚幻引擎的订阅用户。
- 已经拥有GitHub账号。
- 已经根据在GitHub上访问虚幻引擎源代码文中的所述步骤,将GitHub账号与你的虚幻引擎账号关联。
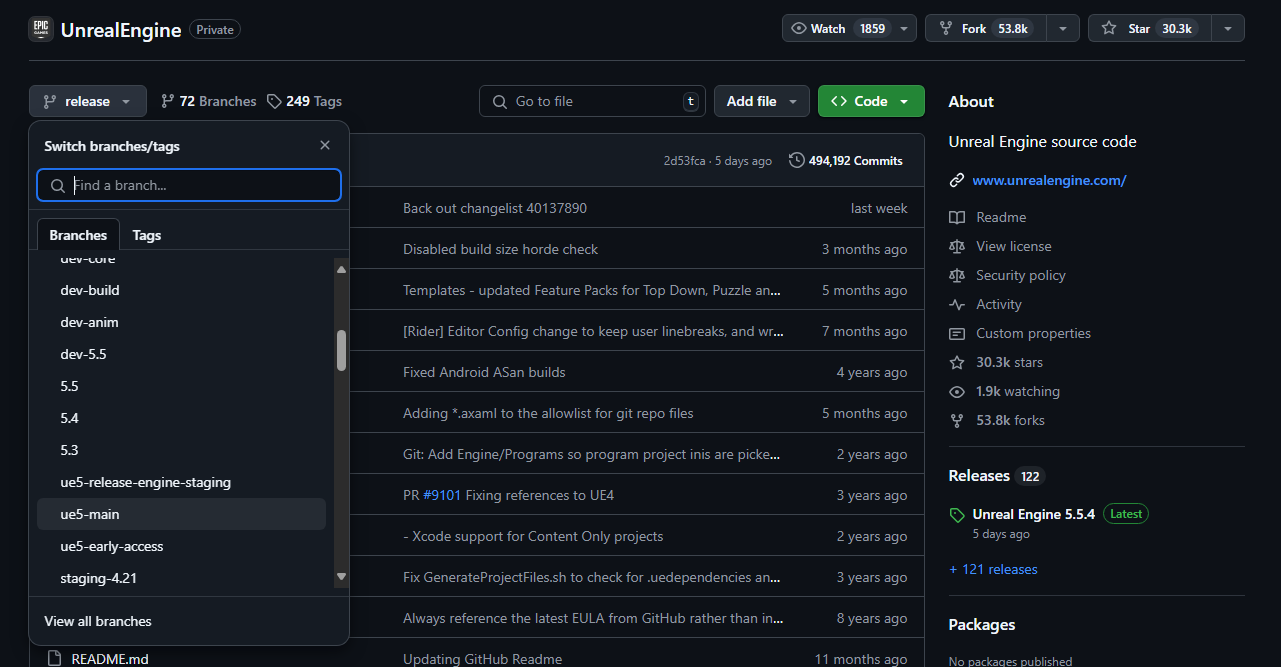
分支
源代码分支
UE5源代码发布在若干个分支中。
名称中包含dev、staging和test的分支通常给Epic内部流程使用,对于终端用户几乎没有用处。当官方对新版本进行稳定性更新或者发布补丁时,其它临时的分支也会时不时地出现。
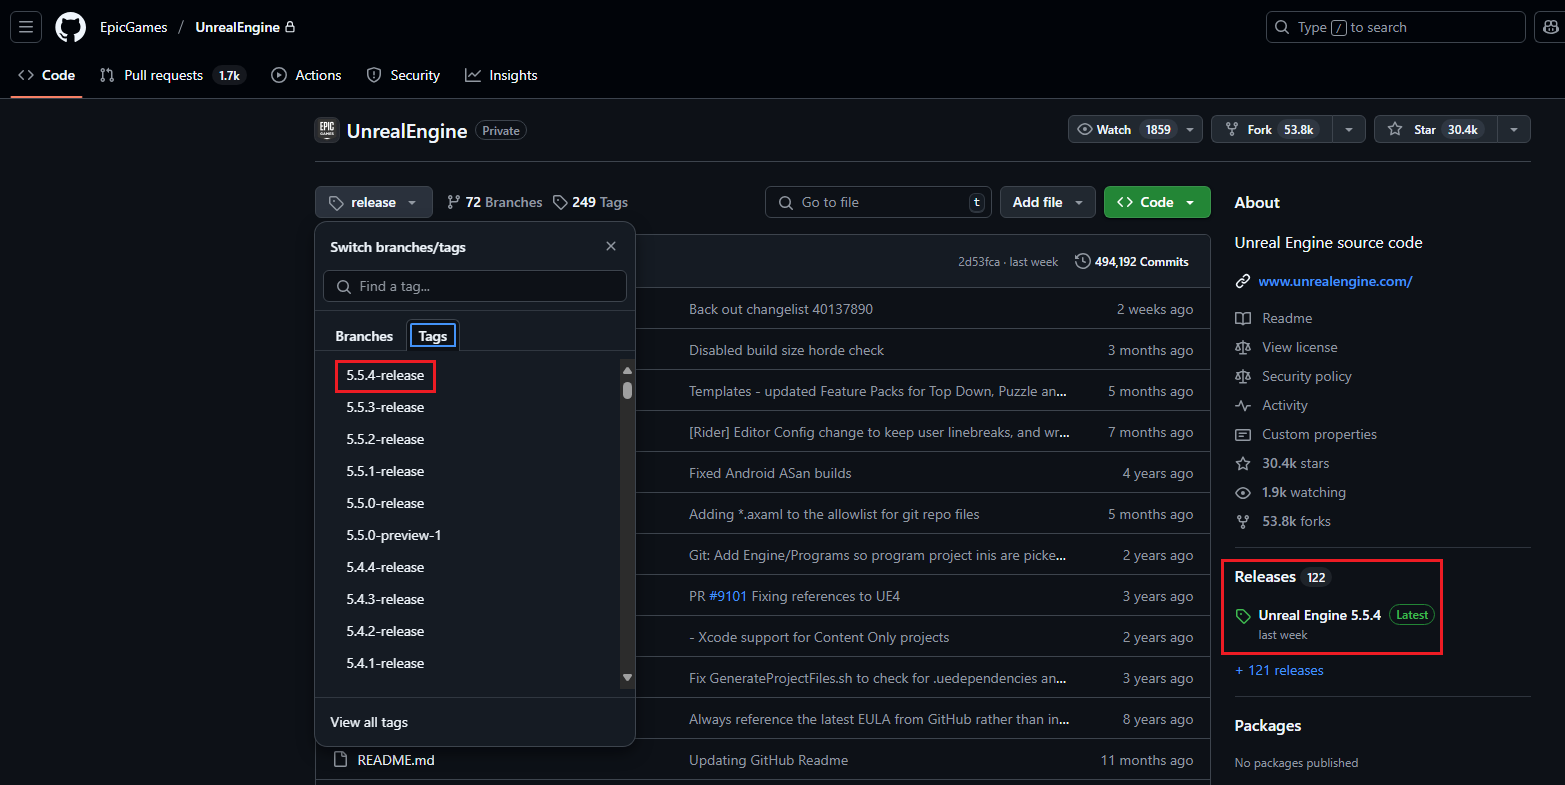
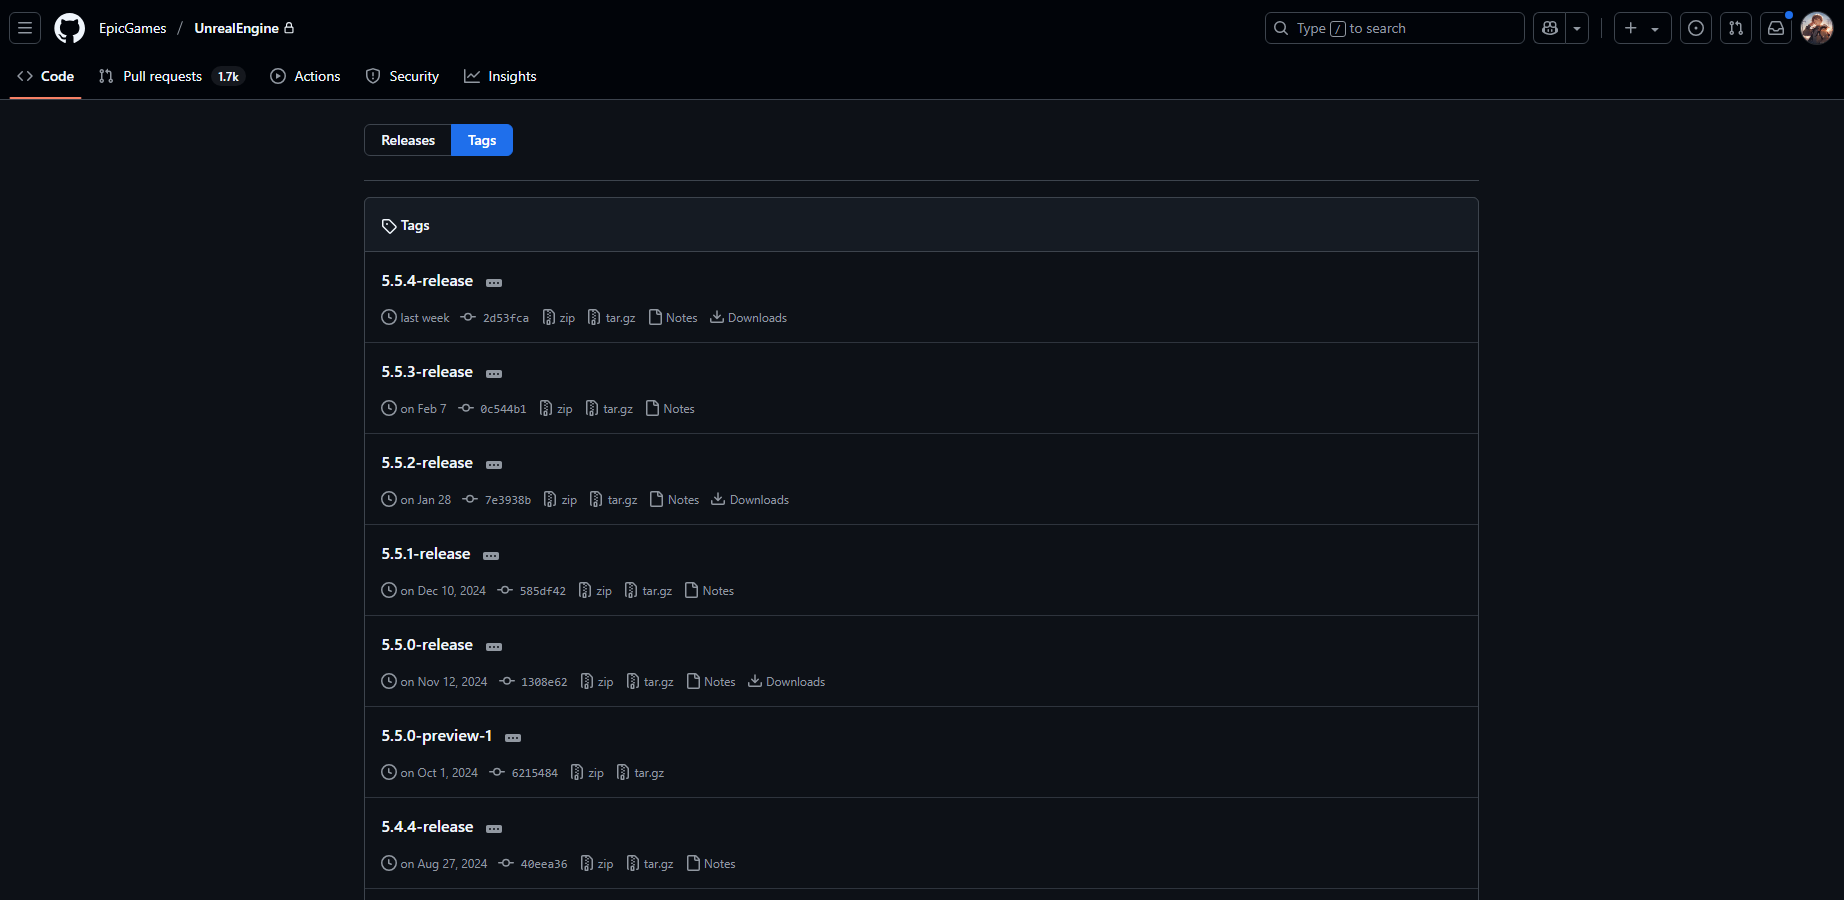
发布分支
发布(Release) 分支会一直和当前的官方版本保持一致。它们经过我们官方QA团队全面的测试,所以对于学习虚幻引擎和制作自己的项目来说是一个很好的起始点。官方花费大量精力来确保每次发布的版本都稳定可靠,并且计划每隔几个月发布新的版本。
主分支
大部分活跃的UE5开发工作在 ue5-main 分支中进行。该分支是引擎最新的发布版本,可能存在一些bug,或者甚至无法正常编译。开发者可用用它来测试新功能或者与我们一起进行锁步开发。
如果你要使用该分支,请注意它会比当前官方版本和下一个要发布的版本都要提前。所以你在ue5-main分支中创建的内容和代码可能与当前官方发布的版本并不兼容,需要等官方之后从ue5-main中创建新分支用于发布之后。
运行 Perforce 服务器又两种方式,P4D 和 P4S。P4D 运行时是一个命令行命令,因此它通常被用来做维护工作时使用。P4S 是一个和 P4D 相同功能的服务,这能让服务器程序在后台运行。 当安装 Perforce 服务器工具后,P4S 通常都会被安装并在后台启动。
有时候服务并没有自动启动。要先Windows系统中启动服务,首先找到 Control Panel -> Administrative Tools ->Services applet。 然后在列表中找到 Perforce Service 并启动它:

下载源码
我们构建直接下载使用官方的发布版本即可,保证其稳定性。
三、Perforce
Perforce的安装我们查看 从零开始在NAS上配置Perforce并启用虚幻引擎源码管理,
当然没有服务器,我们也可以在windows中安装Docker部署Perforce。
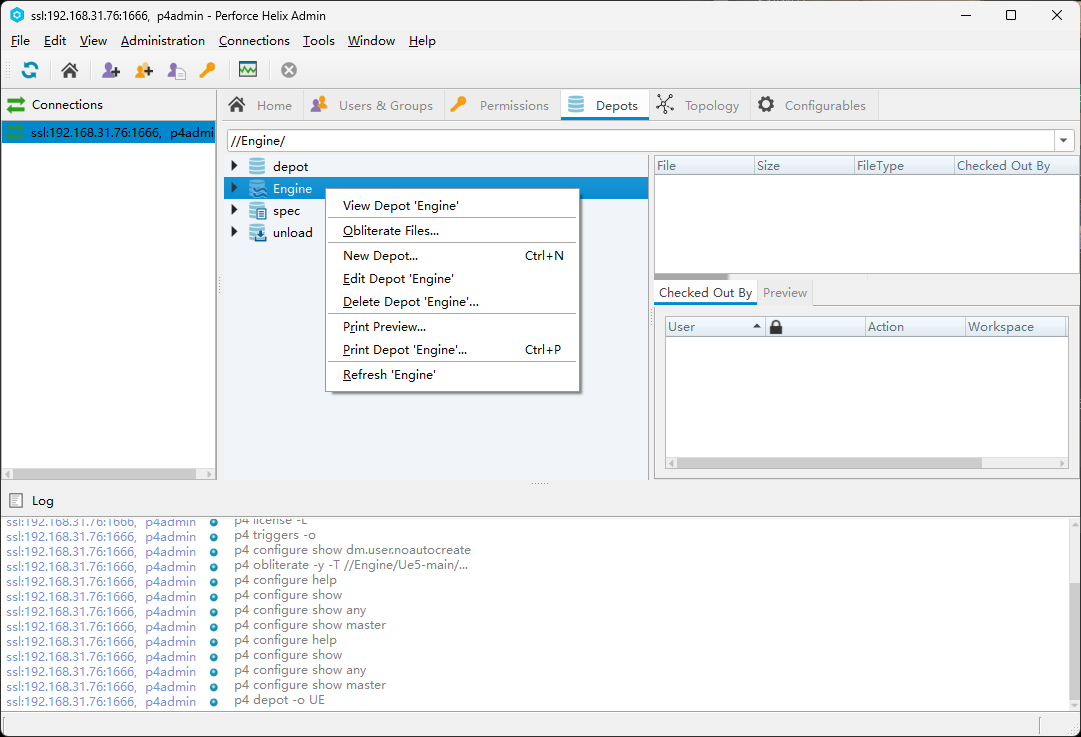
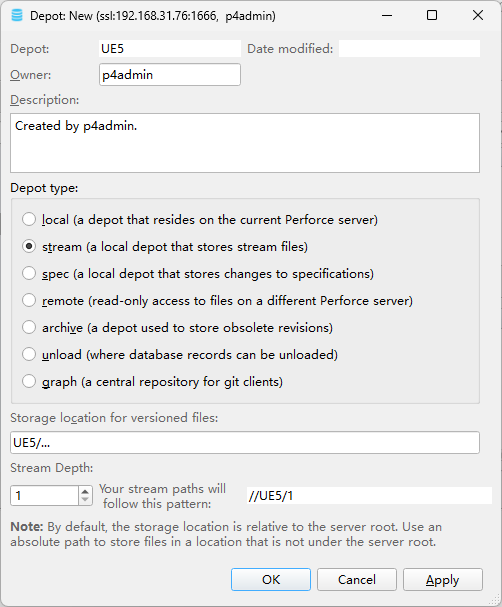
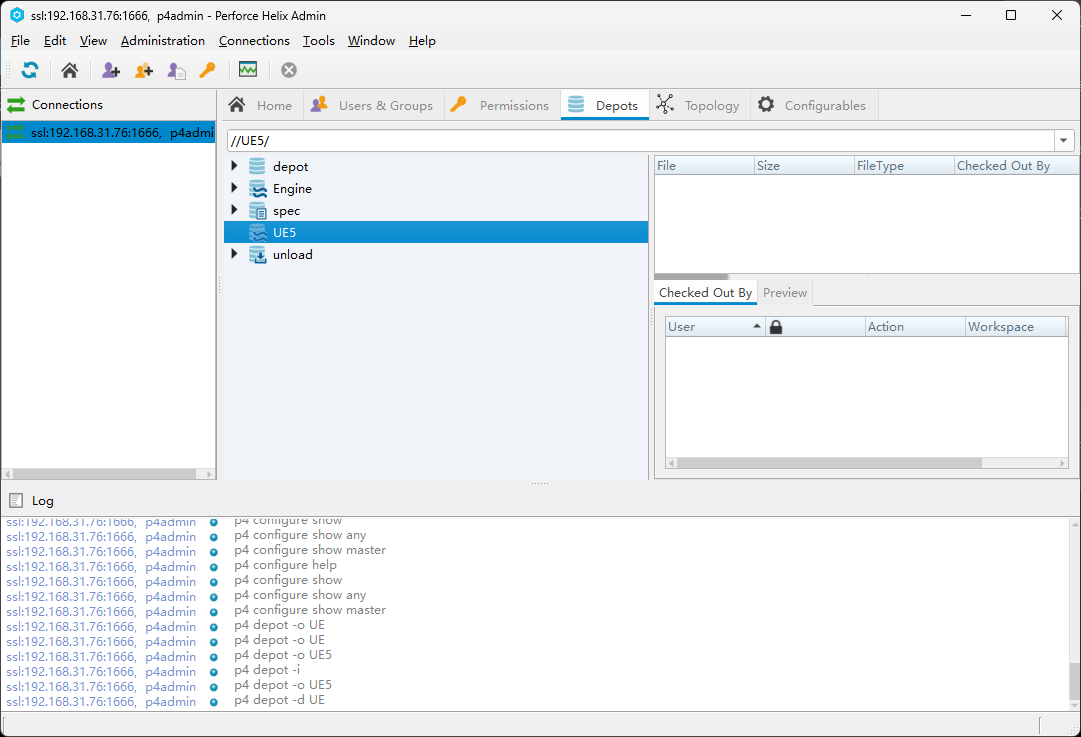
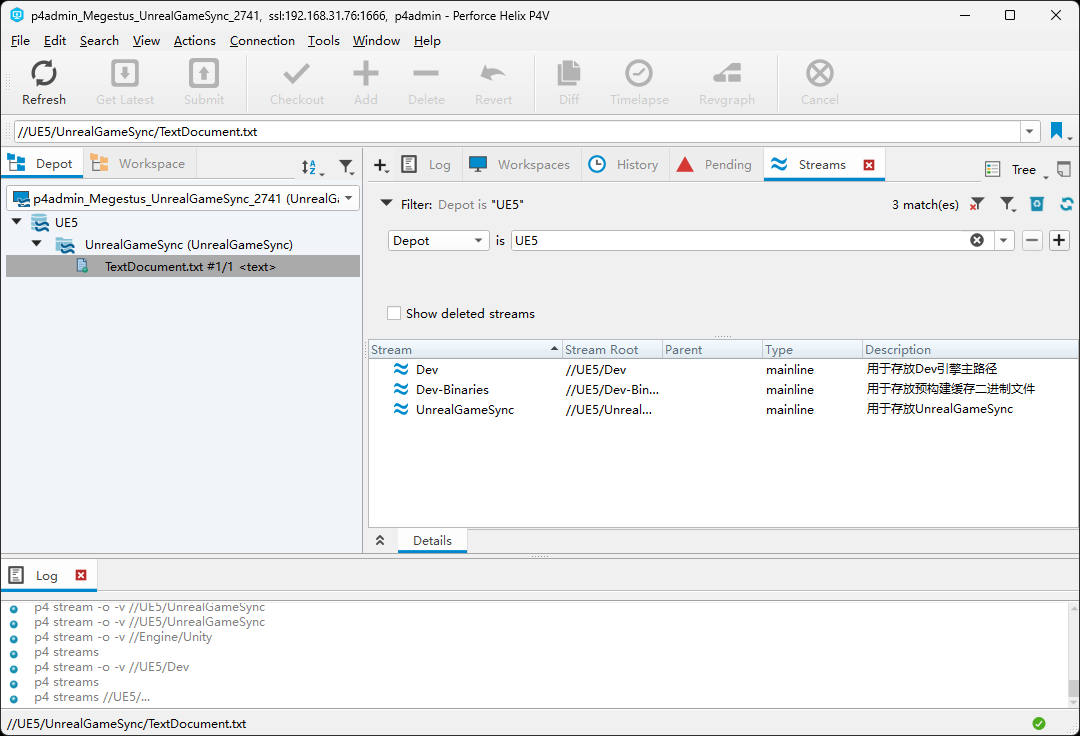
我们开始打开P4Admin和P4V连接服务器 创建流仓库和流
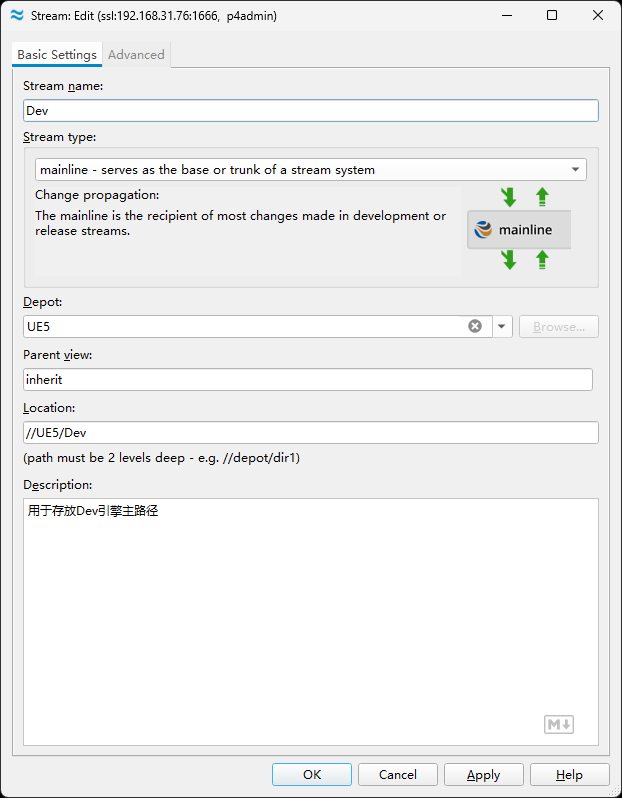
在P4Admin新建SteamsDepot UE5
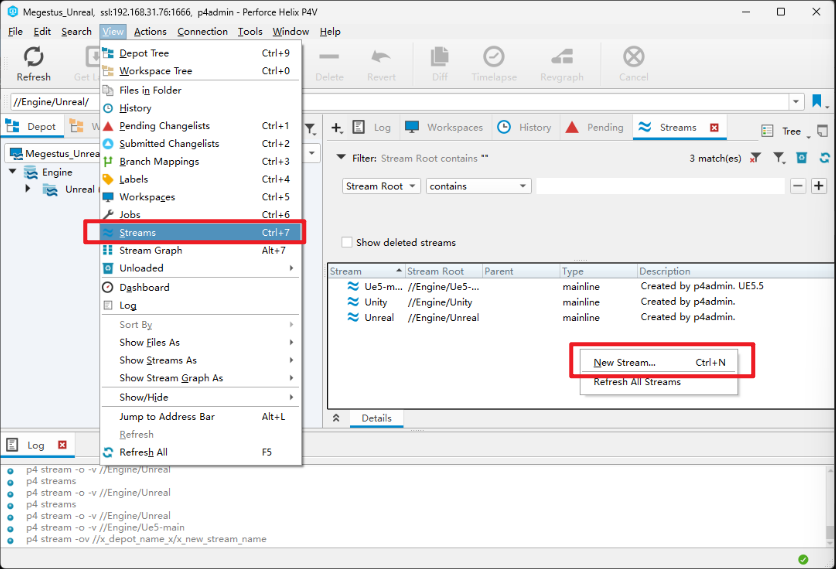
在P4V上创建Steams
| 仓库 | 适用范围 | ||
|---|---|---|---|
| Dev | //UE5/Dev | UE | 用于存放Dev引擎主路径 |
| Dev-Binaries | //UE5/Dev-Binaries | UE | 用于存放预构建缓存二进制文件 |
| UnrealGameSync | //UE5/UnrealGameSync | UE | 用于存放UnrealGameSync |


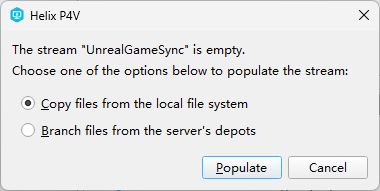
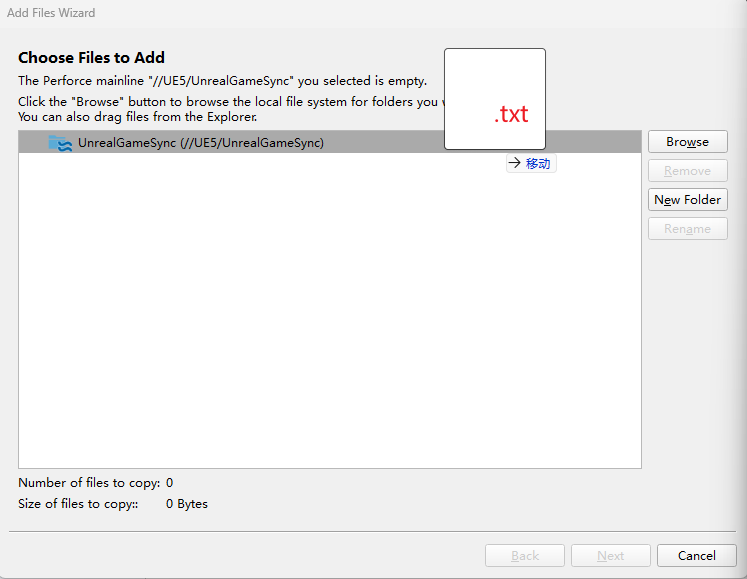
创建好流后,会提示仓库为空,需要上传一个文件到流仓库目录下,可新建一个txt 文件,直接拖拽进去即可.

Perforce设置WorkSpace
传一个文件到流仓库目录下时会临时自动创建一个随机名称的Workspace,那么我们需要新建的Workspace根据项目需求并规范化命名。
- 开发Dev仓库Workspace
- Binaries用于存放预编译二进制文件
- UnrealGameSync仓库Workspace
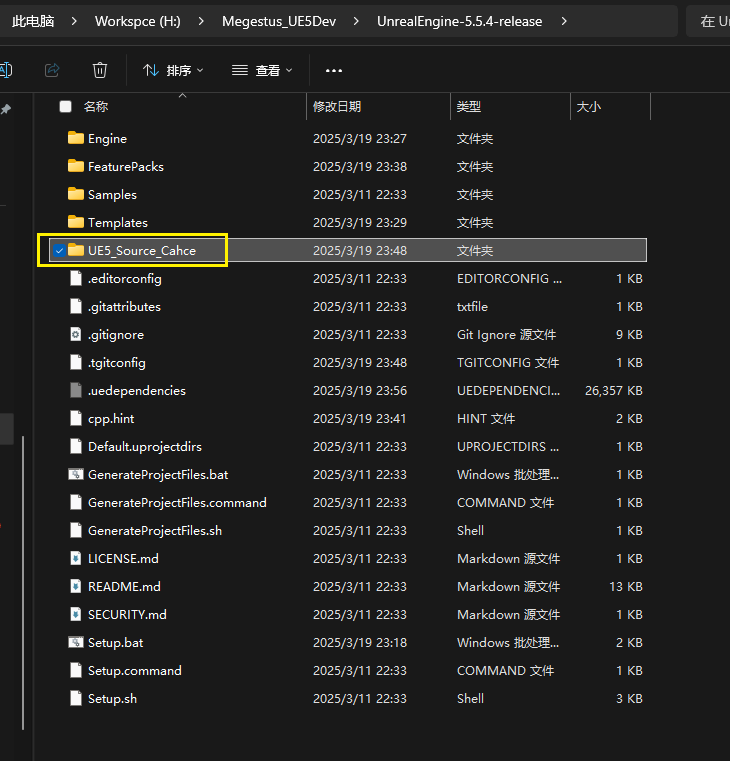
Setup.bat优化加速设置
设置Setup.bat文件中下载线程与过滤以及指认缓存位置
--threads=20 --cache=%~dp0UE5_Source_Cache
总览Setup.bat
@echo off
setlocal
pushd "%~dp0"
rem Figure out if we should append the -prompt argument
set PROMPT_ARGUMENT=
for %%P in (%*) do if /I "%%P" == "--prompt" goto no_prompt_argument
for %%P in (%*) do if /I "%%P" == "--force" goto no_prompt_argument
set PROMPT_ARGUMENT=--prompt --threads=20 --cache=%~dp0UE5_Source_Cache
:no_prompt_argument
rem Sync the dependencies...
.\Engine\Binaries\DotNET\GitDependencies.exe %PROMPT_ARGUMENT% %*
if ERRORLEVEL 1 goto error
rem Setup the git hooks...
if not exist .git\hooks goto no_git_hooks_directory
echo Registering git hooks...
echo #!/bin/sh >.git\hooks\post-checkout
echo Engine/Binaries/DotNET/GitDependencies.exe %* >>.git\hooks\post-checkout
echo #!/bin/sh >.git\hooks\post-merge
echo Engine/Binaries/DotNET/GitDependencies.exe %* >>.git\hooks\post-merge
:no_git_hooks_directory
rem Install prerequisites...
echo Installing prerequisites...
start /wait Engine\Extras\Redist\en-us\UE4PrereqSetup_x64.exe /quiet
rem Register the engine installation...
if not exist .\Engine\Binaries\Win64\UnrealVersionSelector-Win64-Shipping.exe goto :no_unreal_version_selector
.\Engine\Binaries\Win64\UnrealVersionSelector-Win64-Shipping.exe /register
:no_unreal_version_selector
rem Done!
goto :end
rem Error happened. Wait for a keypress before quitting.
:error
pause
:end
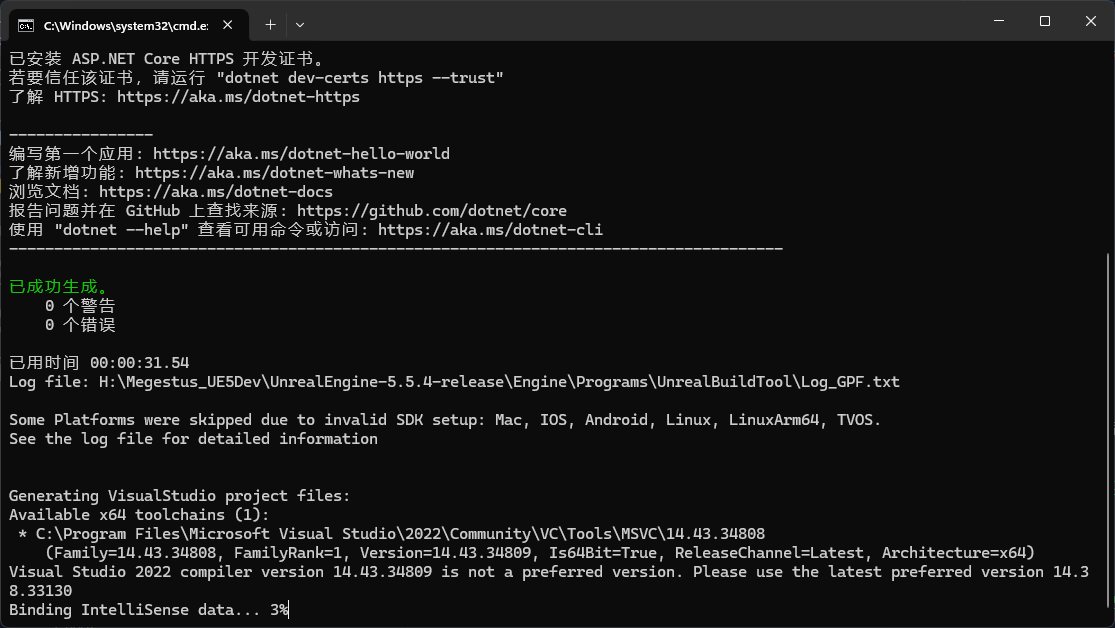
popd双击Setup.bat 这将下载引擎的二进制内容,安装先决条件,并设置虚幻文件关联。
引擎二进制文件的完整下载目前超过 18+ GiB,可能需要一些时间才能完成。后续运行将会快得多,往后只会下载新的和更新的内容。

检查缓存文件是否生成。
UnrealEnigine修改引擎Dir
在UE5Games.uprojectdirs文件最后一行添加项目路径,像这样
; These folders will be searched 1 level deep in order to find projects
; UnrealBuildTool will store the following information:
; - Project name
; - Location of project
; - Whether it has code or not
; - TargetNames contains at the project location
;
./
Engine/Source/
Engine/Programs/
UEProject/
UE5_更改虚幻引擎的缓存路径
可参考这个链接 【UE4基础】更改UE4引擎的缓存路径 教程
将Engine\Config\BaseEnigne.ini引擎版本不可知的用户目录/派生数据缓存%ENGINEVERSIONAGNOSTICUSERDIR%DerivedDataCache
替换为 游戏路径/派生数据缓存%GAMEDIR%DerivedDataCache
下方我也写了一个bat,直接执行即可,只需要根据提示输入引擎BaseEngine.ini所在的路径,会协助替换DDC本地缓存路径至项目根目录下。
@echo off
chcp 65001

echo ===================================================================
echo = Replace the DDC local cache path to the project root directory  =
echo ===================================================================

setlocal enabledelayedexpansion

REM Prompts the user for a path

echo This script will put "ENGINEVERSIONAGNOSTICUSERDIR%DerivedDataCache"
echo replace "GAMEDIR%DerivedDataCache"
echo Please enter the path where the BaseEngine.ini engine is located below:
echo Hint: ".. \UE 5.4\Engine\Config"
echo ===================================================================

REM Gets the path to the input

set /p userPath=

REM Replace the path entered by the user into the 'path_to_file' variable

set "path_to_file=%userPath%\BaseEngine.ini"
set "search_string=%ENGINEVERSIONAGNOSTICUSERDIR%DerivedDataCache"
set "replace_string=%GAMEDIR%DerivedDataCache"

REM Read the contents of the file line by line and replace the specified string before writing back to the original file

for /f "delims=" %%a in ('type "%path_to_file%" ^& break ^> "%path_to_file%"') do (
    set "line=%%a"
    >>"%path_to_file%" echo(!line:%search_string%=%replace_string%!
)

REM Prompt to exit after 5 seconds
echo Done  Exit in 5 seconds
ping -n 5 127.0.0.1 > nul
exit@echo off
chcp 65001
echo ==========================================
echo = 替换DDC本地缓存路径至项目根目录下 =
echo ==========================================
setlocal enabledelayedexpansion
REM 提示用户输入路径
echo 将会找到 "ENGINEVERSIONAGNOSTICUSERDIR%DerivedDataCache"
echo 替换为 "GAMEDIR%DerivedDataCache"
echo 请在下方输入引擎BaseEngine.ini所在的路径:
echo 提示:"..\UE_5.4\Engine\Config"
echo ==========================================
REM 获取输入的路径
set /p userPath=
REM 将用户输入的路径替换到 path_to_file 变量中
set "path_to_file=%userPath%\BaseEngine.ini"
set "search_string=%ENGINEVERSIONAGNOSTICUSERDIR%DerivedDataCache"
set "replace_string=%GAMEDIR%DerivedDataCache"
REM 逐行读取文件内容并替换指定字符串后写回到原文件中
for /f "delims=" %%a in ('type "%path_to_file%" ^& break ^> "%path_to_file%"') do (
set "line=%%a"
>>"%path_to_file%" echo(!line:%search_string%=%replace_string%!
)
REM 提示完成
echo "完成,五秒后退出."
ping -n 5 127.0.0.1 > nul
exitTypemap
- Typemap是让Perforce服务器可编译储存项目所需的各类格式的文件
在Perforce的仓库中右击打开CMD编辑器并输入以下代码
p4 typemap在打开的Typemap文件中替换下方typemap代码,完成编辑后,点击键盘上的 Ctrl+S 保存并退出。命令行应该会提示 Typemap saved。
# The form data below was edited by admin
# Perforce File Type Mapping Specifications.
#
#  TypeMap:	a list of filetype mappings; one per line.
#		Each line has two elements:
#
#  		Filetype: The filetype to use on 'p4 add'.
#
#  		Path:     File pattern which will use this filetype.
#
# See 'p4 help typemap' for more information.

TypeMap:
	text //....asp
	text //....cnf
	text //....css
	text //....htm
	text //....html
	text //....inc
	text //....js
	text+w //....log
	text+w //....ini
	text+w //....pdm
	binary+Fl //....zip
	binary+Fl //....bz2
	binary+Fl //....rar
	binary+Fl //....gz
	binary+Fl //....avi
	binary+Fl //....jpg
	binary+Fl //....jpeg
	binary+Fl //....mpg
	binary+Fl //....gif
	binary+Fl //....tif
	binary+Fl //....mov
	binary+Fl //....jar
	binary+l //....ico
	binary+l //....exp
	binary+l //....btr
	binary+l //....bmp
	binary+l //....doc
	binary+l //....dot
	binary+l //....xls
	binary+l //....ppt
	binary+l //....pdf
	binary+l //....tar
	binary+l //....exe
	binary+l //....dll
	binary+l //....lib
	binary+l //....bin
	binary+l //....class
	binary+l //....war
	binary+l //....ear
	binary+l //....so
	binary+l //....rpt
	binary+l //....cfm
	binary+l //....ma
	binary+l //....mb
	binary+l //....pac
	binary+l //....m4a
	binary+l //....mp4
	binary+l //....aac
	binary+l //....wma
	binary+l //....docx
	binary+l //....pptx
	binary+l //....xlsx
	binary+l //....png
	binary+l //....raw
	binary+l //....odt
	binary+l //....ods
	binary+l //....odg
	binary+l //....odp
	binary+l //....otg
	binary+l //....ots
	binary+l //....ott
	binary+l //....psd
	binary+l //....sxw
	binary+S2w //....exe
	binary+S2w //....dll
	binary+S2w //....lib
	binary+S2w //....app
	binary+S2w //....dylib
	binary+S2w //....stub
	binary+S2w //....ipa
	binary //....bmp
	text //....ini
	text //....config
	text //....cpp
	text //....h
	text //....c
	text //....cs
	text //....m
	text //....mm
	text //....py
	binary+l //....uasset
	binary+l //....umap
	binary+l //....upk
	binary+l //....udk
	binary+w //....exe
	binary+w //....dll
	binary+w //....lib
	binary+w //....app
	binary+w //....dylib
	binary+w //....stub
	binary+w //....ipa
	binary //....bmp
	text //....ini
	text+w //....config
	text //....cpp
	text //....h
	text //....c
	text //....cs
	text //....m
	text //....mm
	text //....py
	binary+l //....uasset
	binary+l //....umap
	binary+l //....upk
	binary+l //....udk
	binary+l //....ubulk
	text //....ignore
上传源码至Perforce
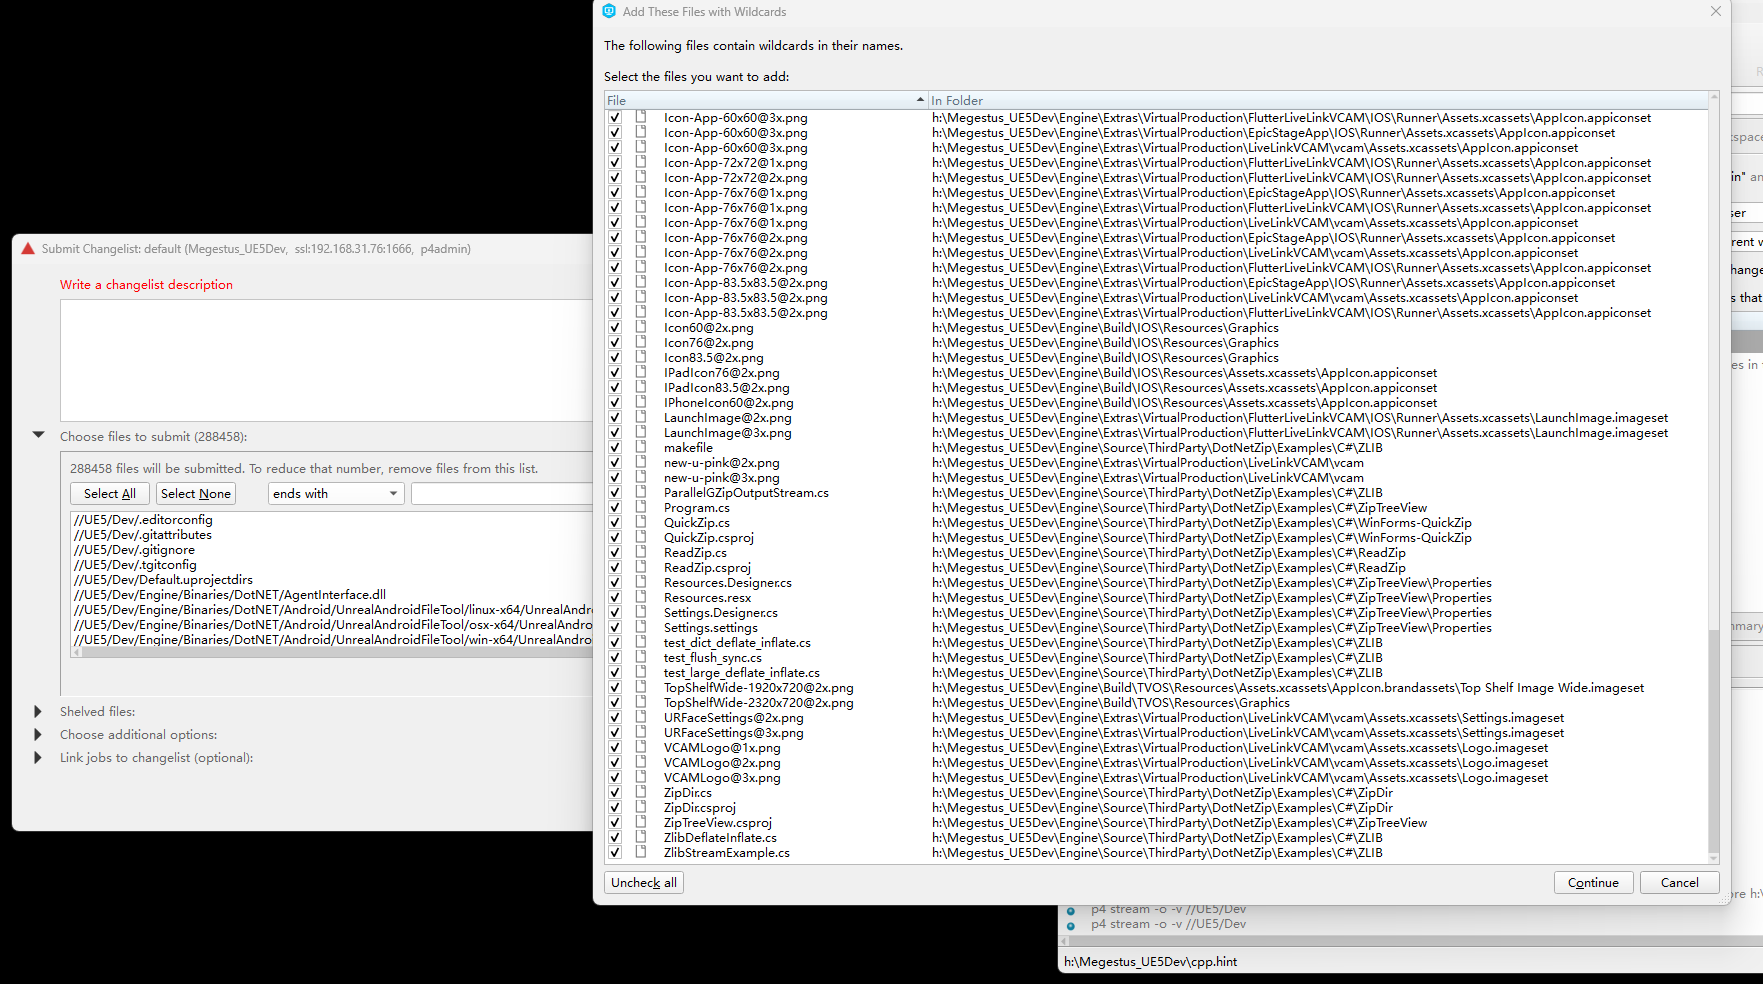
把我们下载好的源码zip,解压到我们指定的Workspass Dev仓库根目录中

提示
值得注意的是需要保证这个wrokspass的磁盘空间最少要有300GB。
Can't add filenames with wildcards [@#%*] in them.
如果出现这种情况,需要分批次文件递交-把单独出现的文件单独一个chagelist 就可以递交了。
P4ignore
上传完成后设置ignore
# directories
*/.git/*
*/.vs/*
*/obj/Development/*
*/obj/Debug/*
*/obj/x64/*
*/Intermediate/*
*/Saved/*
*/DerivedDataCache/*

# files
*.pdb
*.obj
*.response
*.prev
**DebugGame*
*.pch
*.tmp
*.dSYM
*.VC.db
*.opensdf
*.opendb
*.sdf
*.suo
*.log
*.DS_Store
*.ipch
*.vscode/*
*.idea/*
*.sln
*.p4config
*.code-workspace
*.ue4dependencies
*/Log.txt
*.akd

**/Engine/DerivedDataCache/*
**/Engine/Binaries/Win64/**Win64-Debug*
**/Engine/Binaries/Mac/**Mac-Debug*
**/Engine/Plugins/**Win64-Debug*
**/Engine/Plugins/**Mac-Debug*

**/Projects/**Win64-Debug*
**/Projects/**Mac-Debug*
**/Projects/**/.vs/*
**/Projects/**/Binaries/*
**/Projects/**/DerivedDataCache/*
**/Projects/**/Intermediate/*
**/Projects/**/Saved/*

!**/Engine/Binaries/DotNET/*
!**/Engine/Intermediate/**.precompiled
!**/Engine/Intermediate/**.lib
!**/Engine/Intermediate/**.o
!**/Engine/Intermediate/**.obj
!**/Engine/Source/**.sln
!**/Engine/Source/**.vscode/*

!**/Projects/**/Content/**.obj

!Dev-Binaries/**.zip

/Engine/DerivedDataCache/*
/Engine/Binaries/Win64/**Win64-Debug*
/Engine/Binaries/Mac/**Mac-Debug*
/Engine/Plugins/**Win64-Debug*
/Engine/Plugins/**Mac-Debug*

/Projects/**Win64-Debug*
/Projects/**Mac-Debug*
/Projects/**/.vs/*
/Projects/**/Binaries/*
/Projects/**/DerivedDataCache/*
/Projects/**/Intermediate/*
/Projects/**/Saved/*

!/Engine/Binaries/DotNET/*
!/Engine/Intermediate/**.precompiled
!/Engine/Intermediate/**.lib
!/Engine/Intermediate/**.o
!/Engine/Intermediate/**.obj
!/Engine/Source/**.sln
!/Engine/Source/**.vscode/*

!/Projects/**/Content/**.obj


!/Dev-Binaries/**.zip- ignore则是 过滤忽略无需同步的文件。
1.新建 .ignore文件并上传至仓库
新建txt文本,重命名为p4ignore.txt,后复制上方.ignore代码,上传P4
2.在Depot右击打开CMD
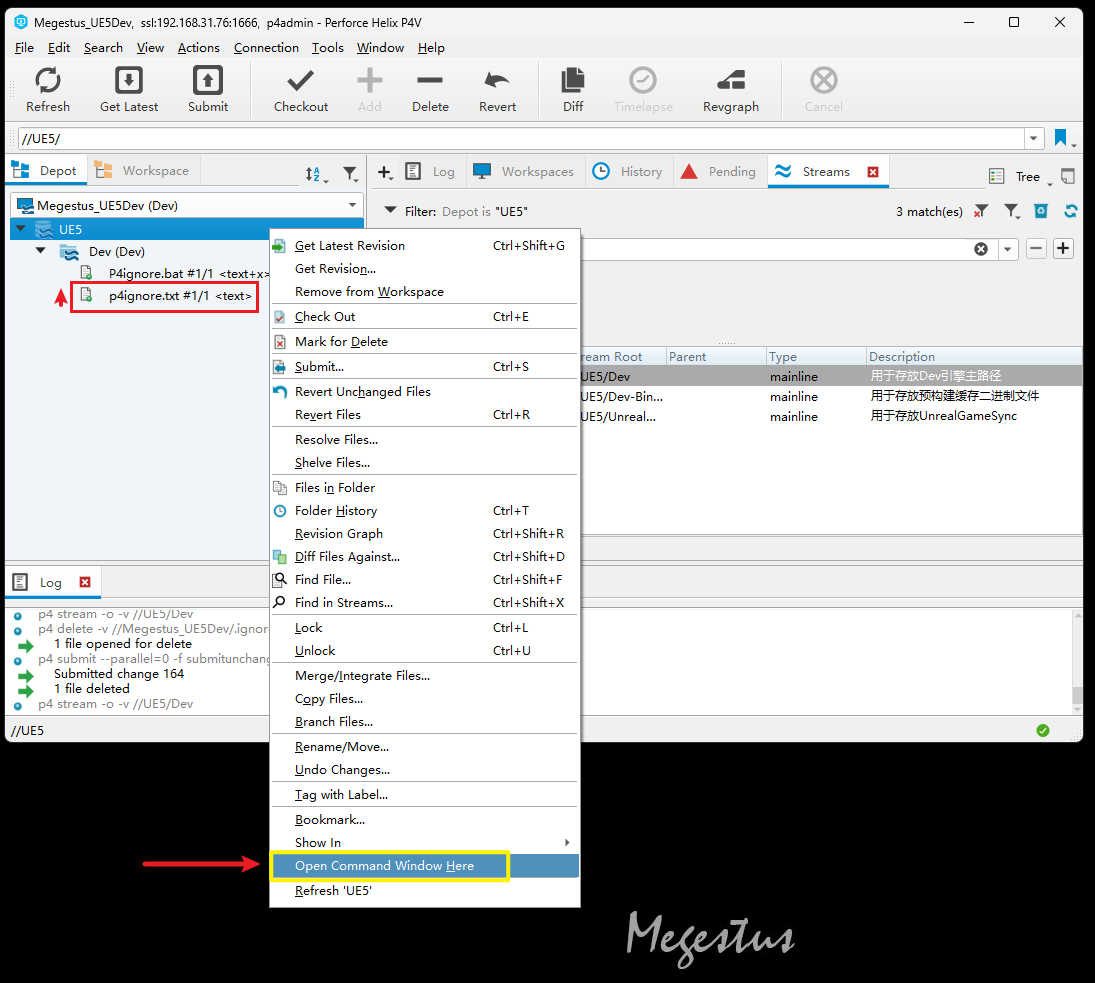
3.运行P4ignore.bat
新建txt文本,重命名为P4ignore.bat,双击运行。
@echo off
set workdir=%~dp0
set result=%workdir%p4ignore.txt
echo %result%
p4 set P4IGNORE="%result%"
pause
4.检查p4 ignores
同理,在P4 CMD中输入
p4 ignores检查p4 ignore是否生效,如生成相应过滤路径,则p4ignore已生效
四、编译源码 (跳过)
提示
以下是常规使用vs编译,我们这里使用BuidGraph提供的功能进行编译。所以这个编译源码可先跳过
GenerateProjectFiles.bat生成解决方案sln
运行GenerateProjectFiles.bat为引擎创建生成解决方案。这应该不到一分钟就能完成
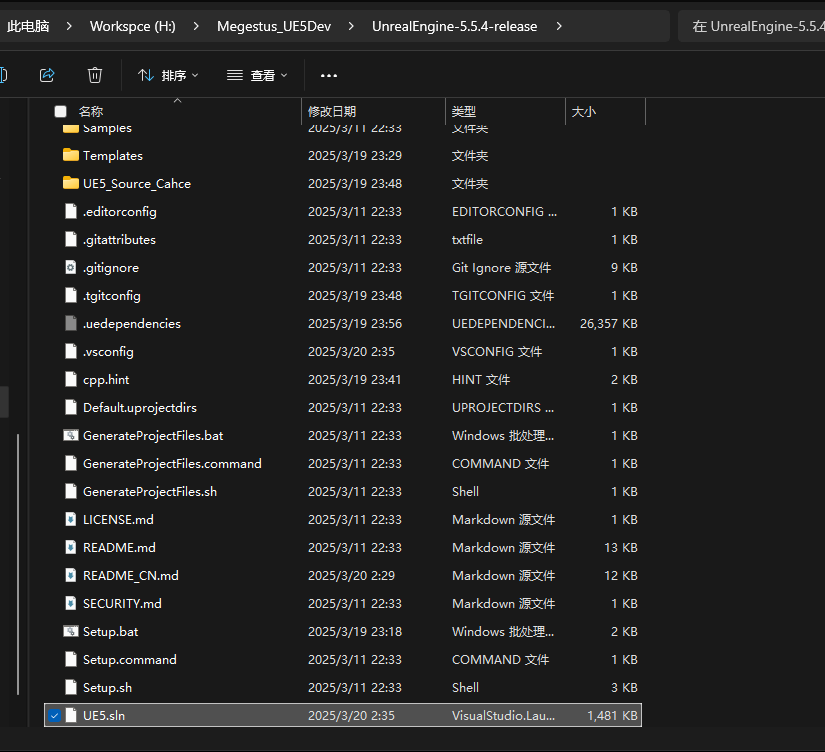
初步编译引擎
通过双击新的UE5.sln文件将项目加载到 Visual Studio 中
将解决方案配置设置为Development Editor,将解决方案平台设置为Win64,然后右键单击UE5目标并选择Build。编译可能需要 10 到 40 分钟才能完成,甚至一到两小时小时也说不定,却决于电脑的CPU。
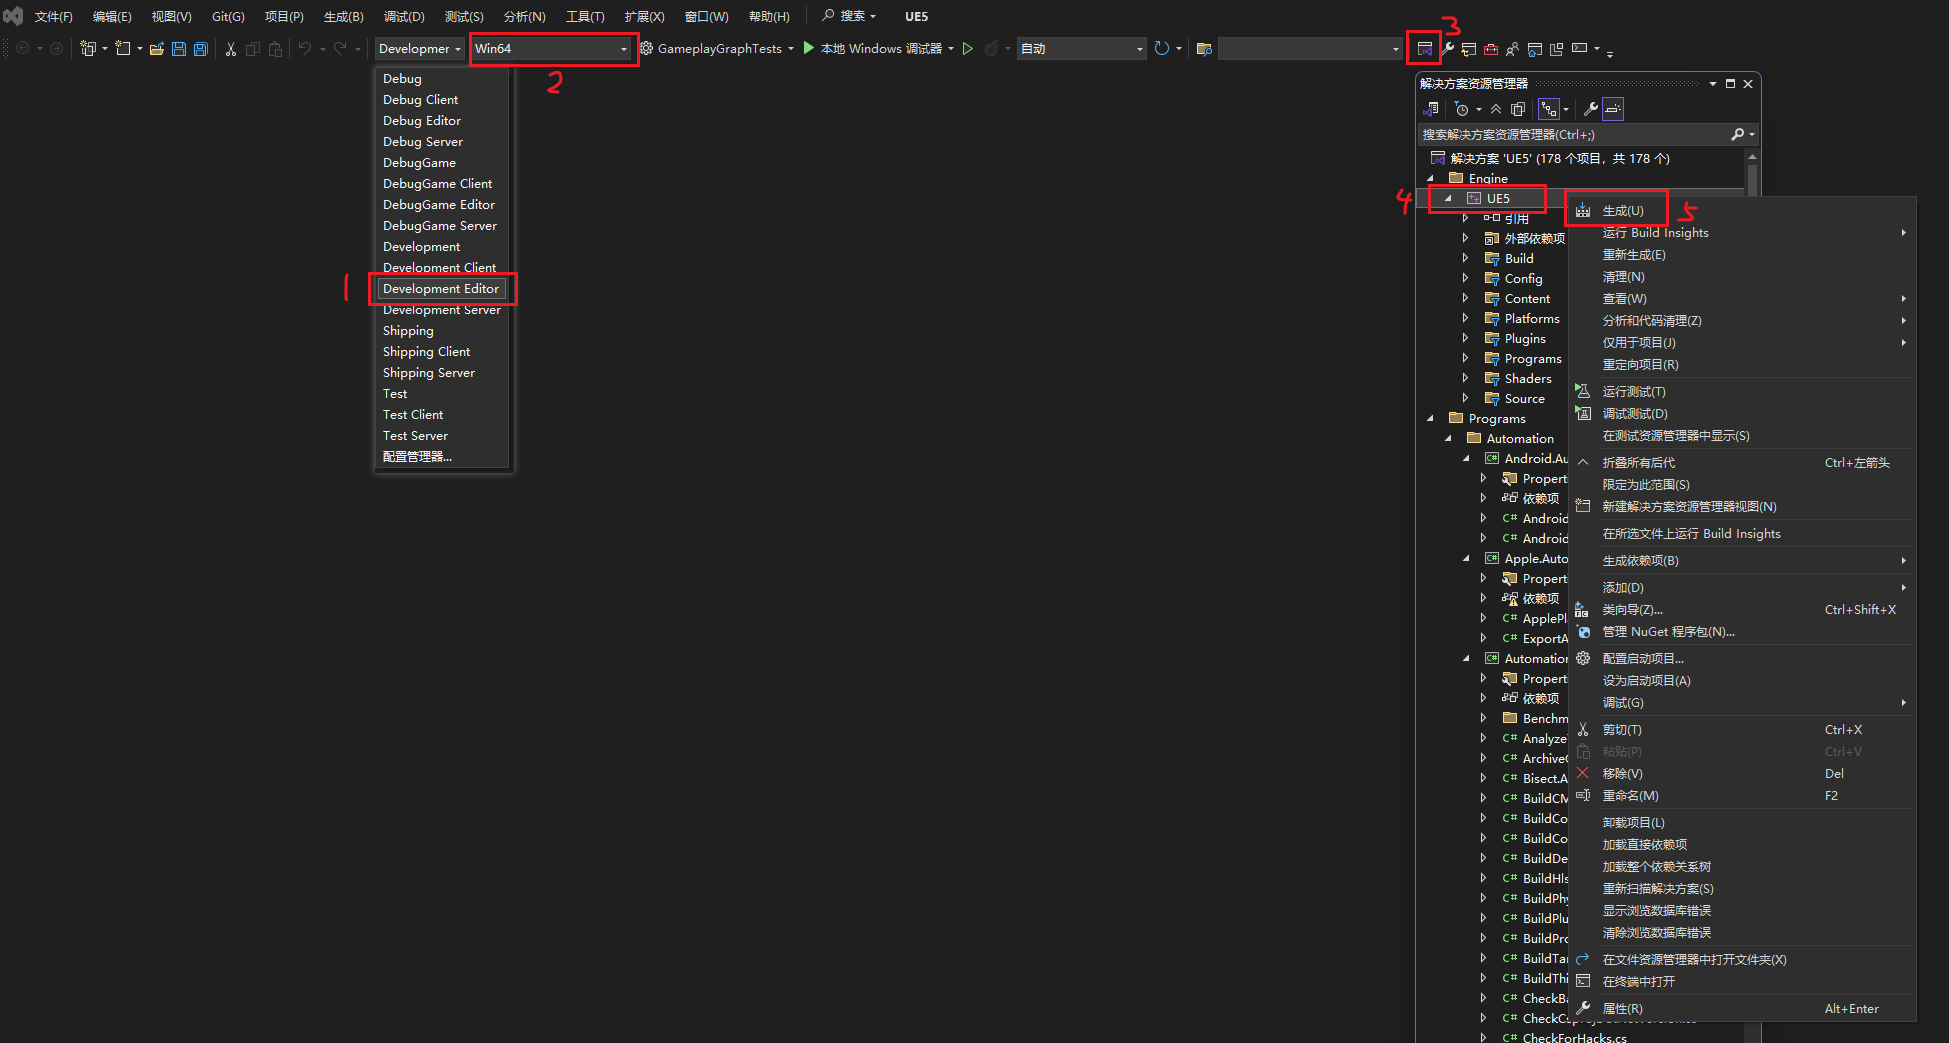
编译完成后,可以通过将启动项目设置为UE5并按F5开始调试,从 Visual Studio 运行编辑器。
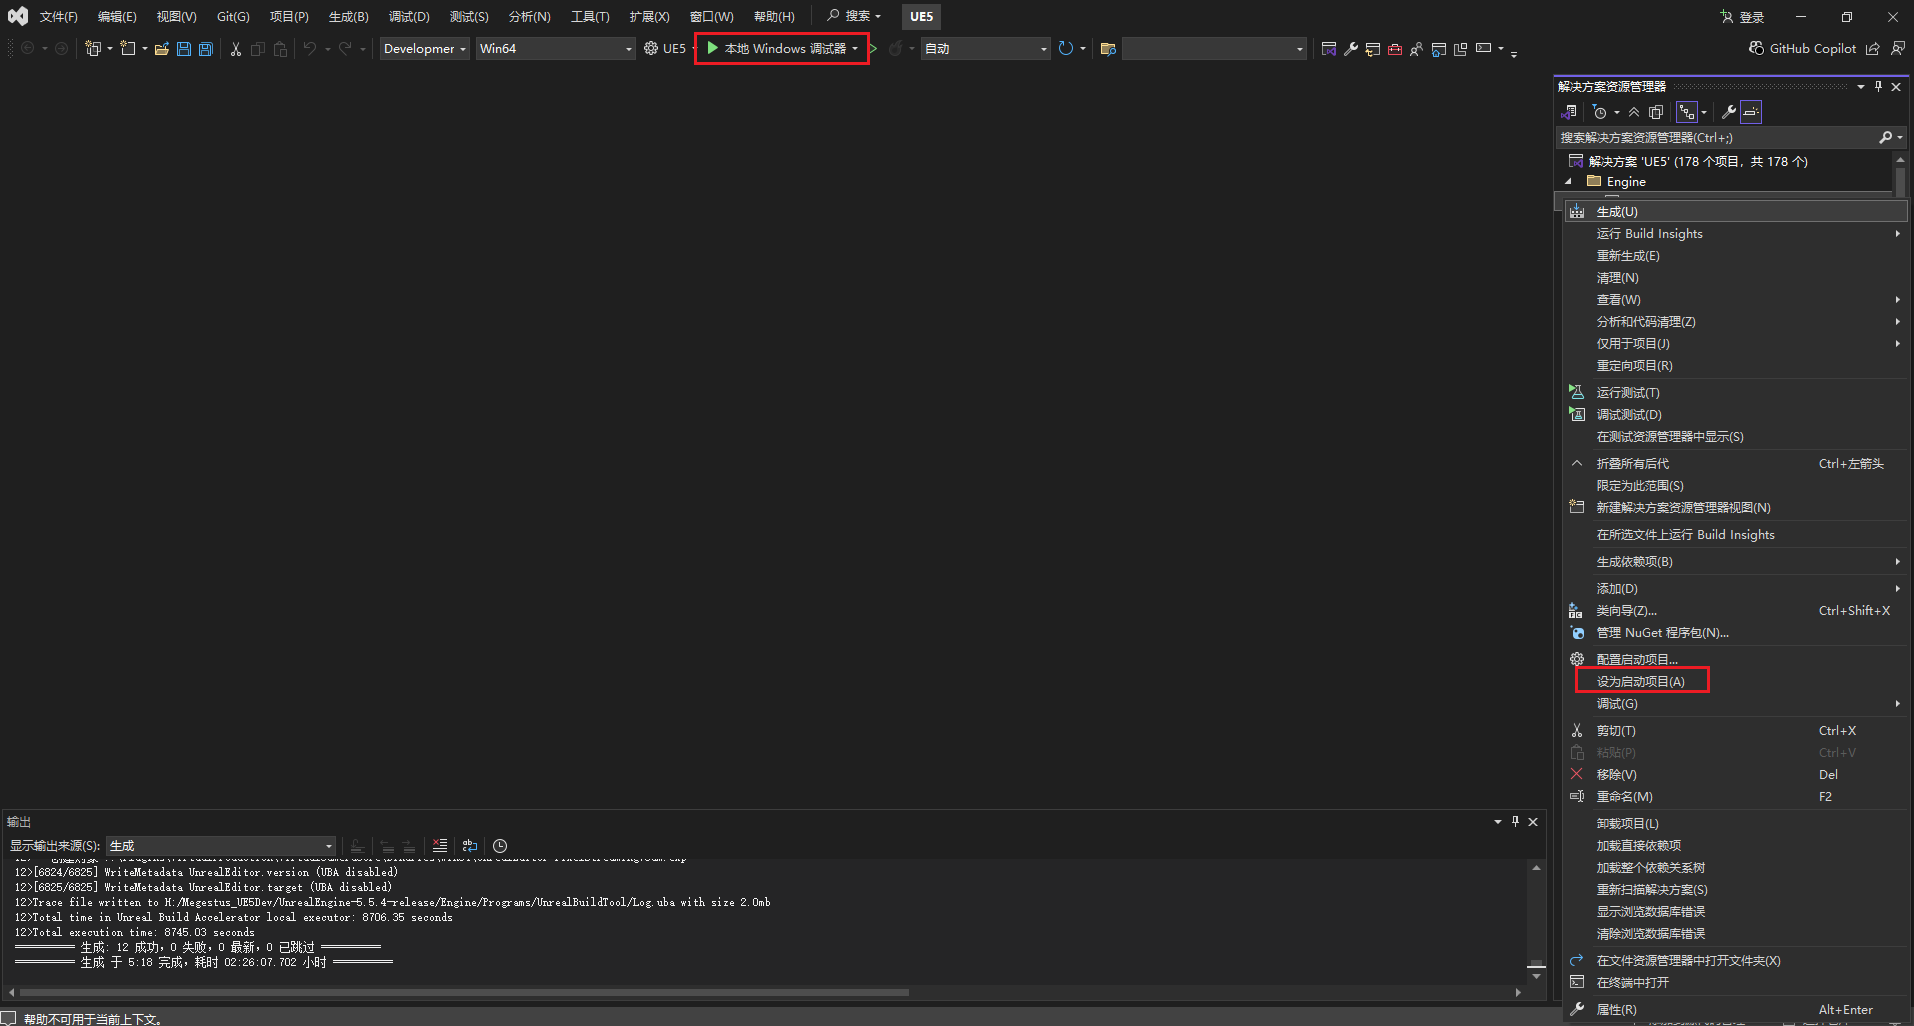
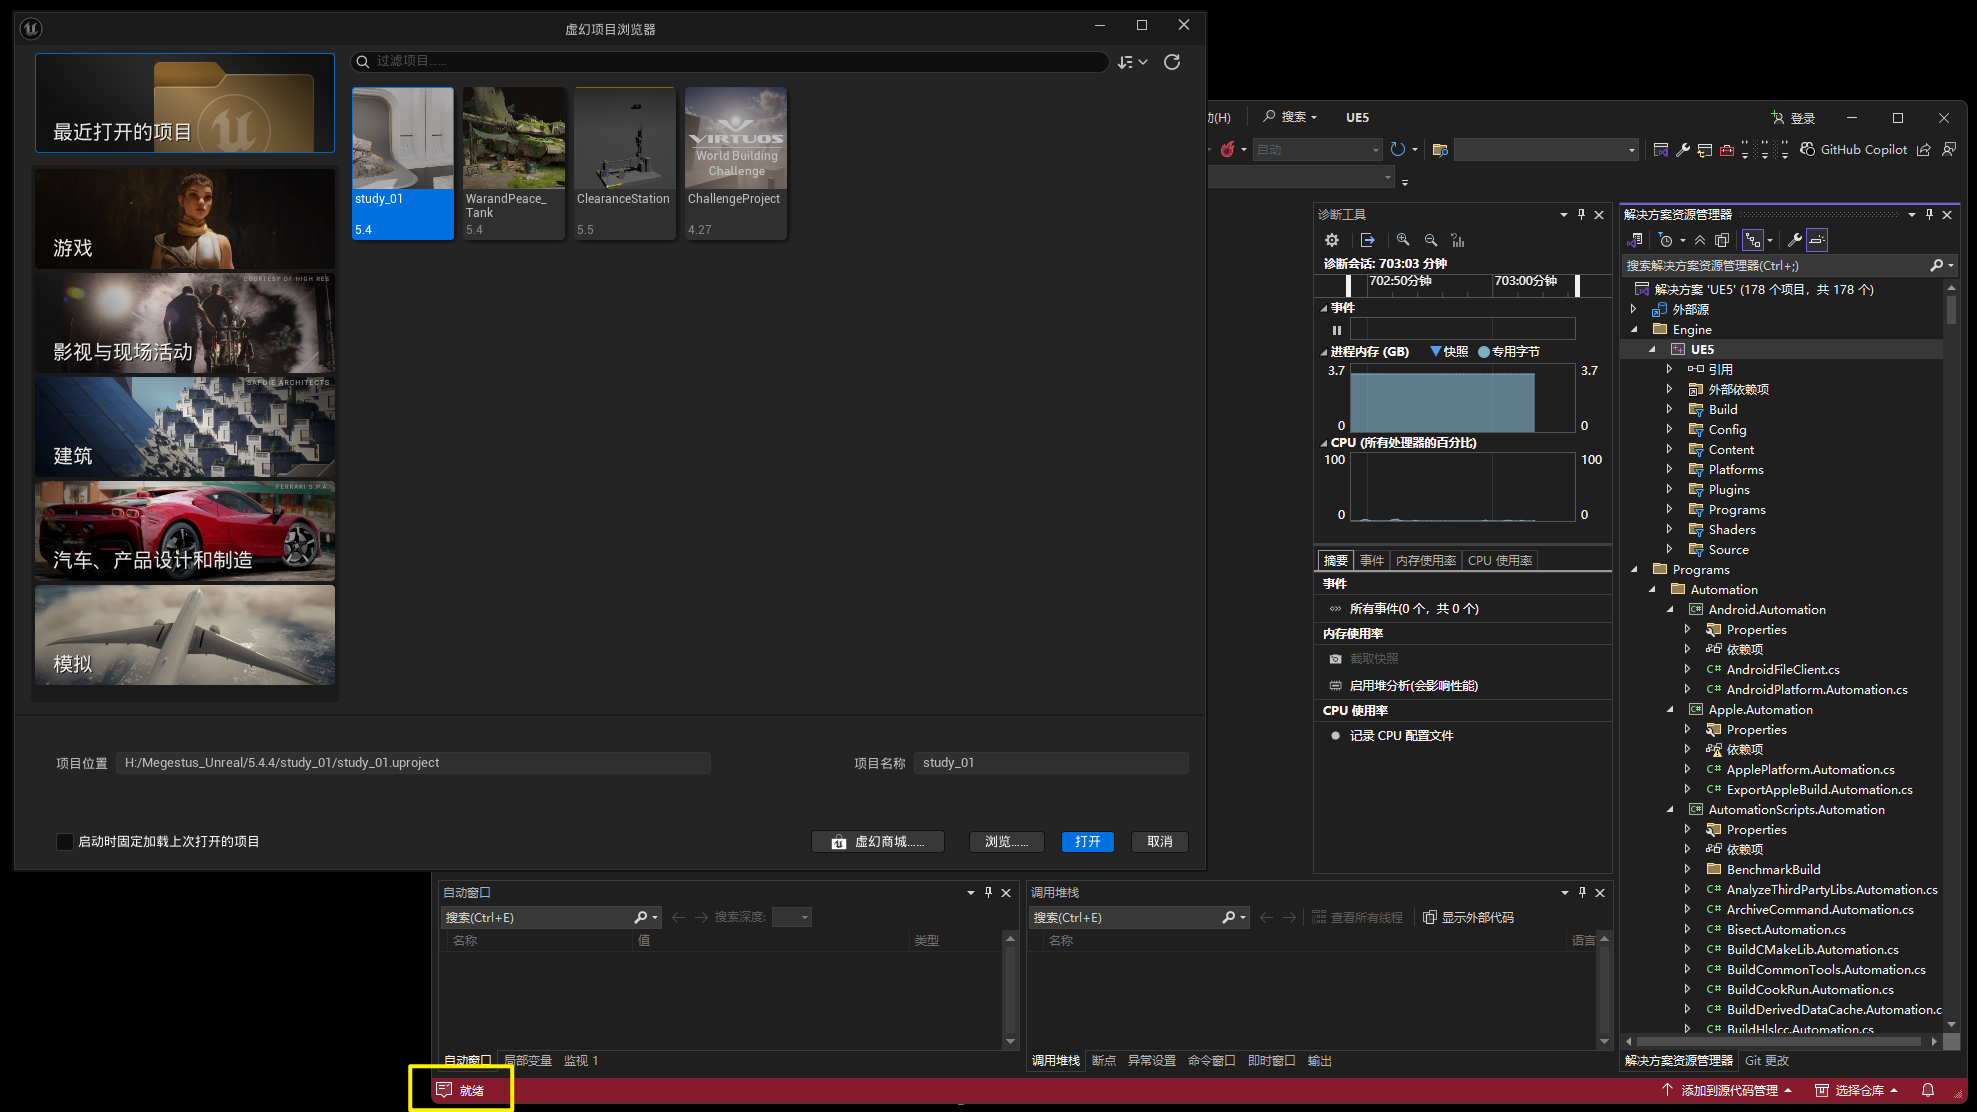
就绪后就启动编辑器了
五、提交工程并创建预编译二进制文件
创建Project
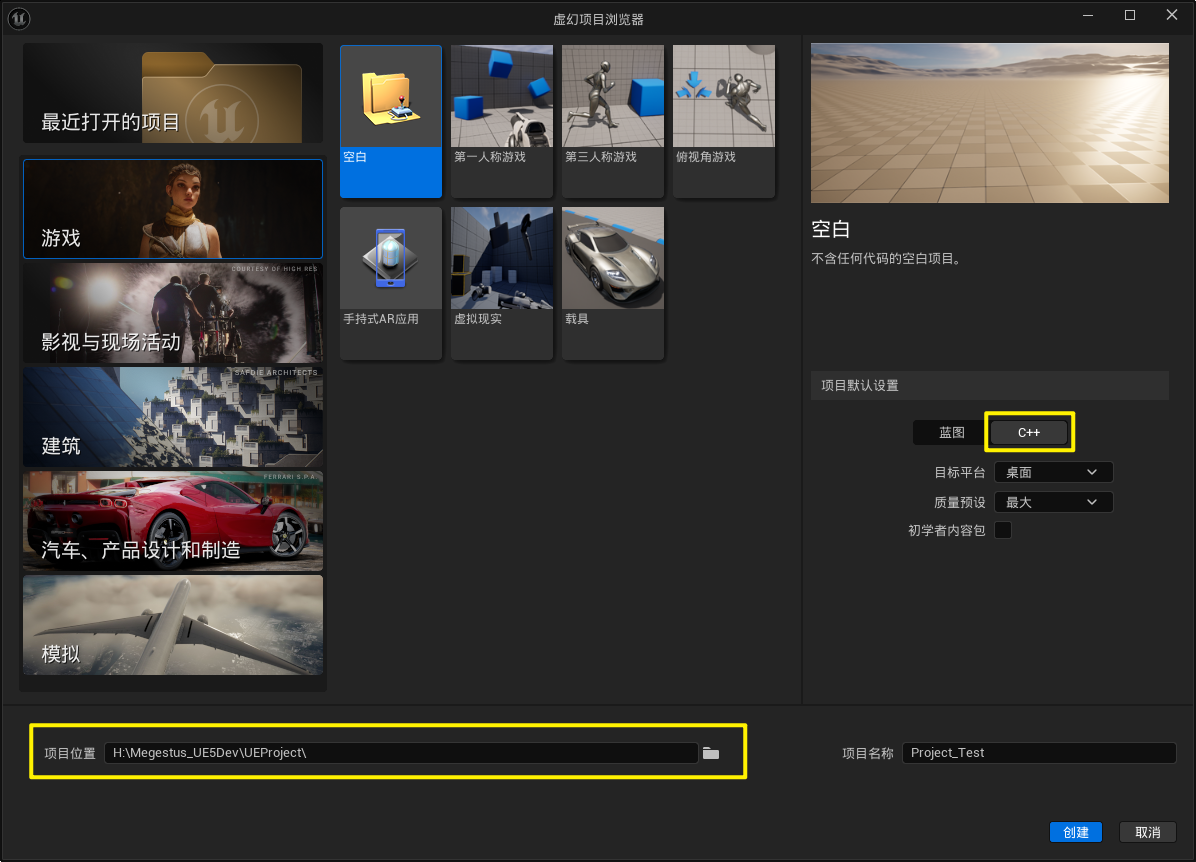
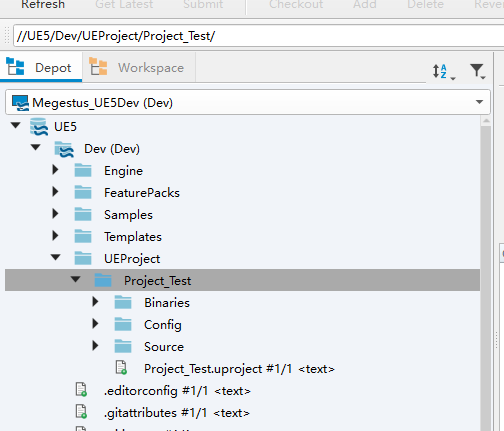
由于引擎还没有编译 所以没有编辑器创建工程-我们使用Eipc Games Launcher 创建一个工程,注意-是创建C++工程
并在Dev目录中创建UEProcjet文件夹 , 这里则是关联Dir的设置。
清除多余的文件
清除多余的文件-工程实际需要递交的也就就这几个文件夹

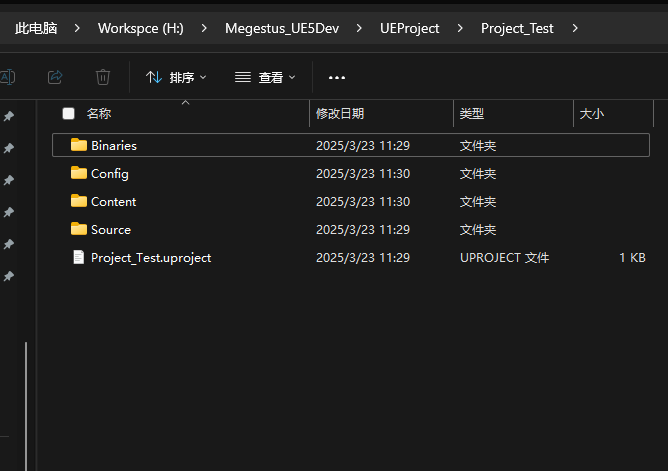
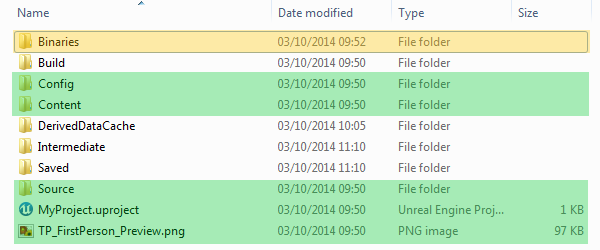
被高亮为 绿色 的目录和文件应该被添加到项目的 Depot 中。Binaries 目录高亮为 黄色,可以选择是否要加入到版本管理中,这取决于团队自生的工作需要。
- 如果团队中每个人都准备自己来编译引擎和游戏的话,那么
Binaries则无需加入到版本管理中, - 但如果团队中有人只是想获取一个版本就能直接在编辑器中工作的话,则需要把
Binaries添加上去。
修改.Project配置
去掉引擎版本初始配置EngineAssociation的配置以方便源码引起指认
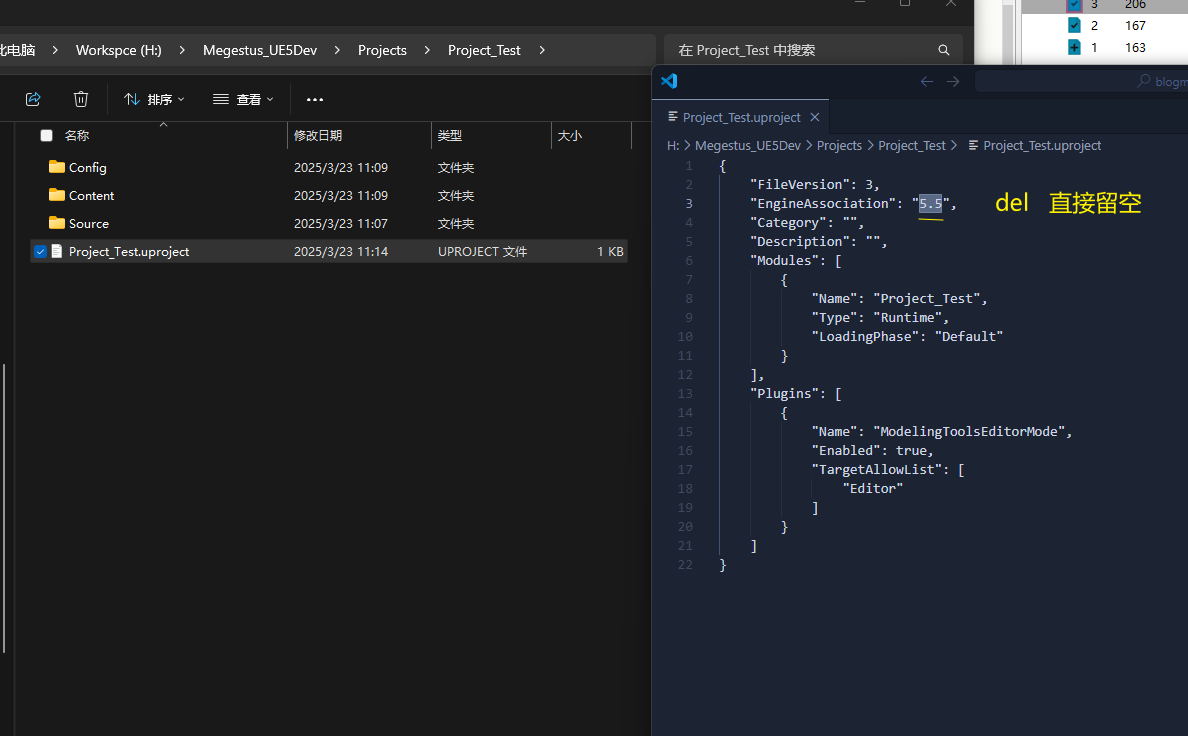
然后就上传到P4中.
生成和上传预编译的二进制文件
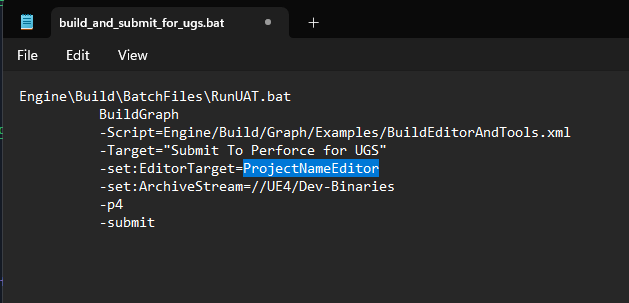
使用 BuildEditorAndTools 的命令示例,创建 build_and_submit_for_ugs.bat,放至根目录下。
Engine\Build\BatchFiles\RunUAT.bat
BuildGraph
-Script=Engine/Build/Graph/Examples/BuildEditorAndTools.xml
-Target="Submit To Perforce for UGS"
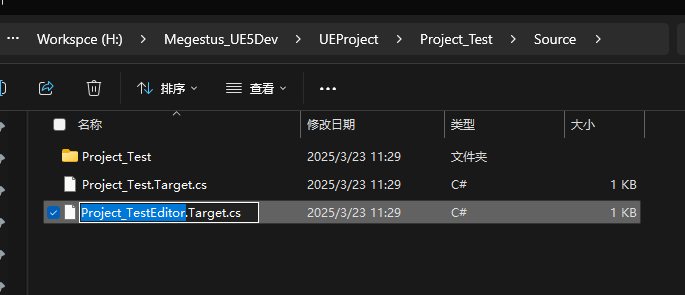
-set:EditorTarget=ProjectNameEditor
-set:ArchiveStream=//UE4/Dev-Binaries
-p4
-submit其中EditorTarget改为我们创建的Procjet_test内的EditorTarget,路径在 UEProject\[Project]\Source
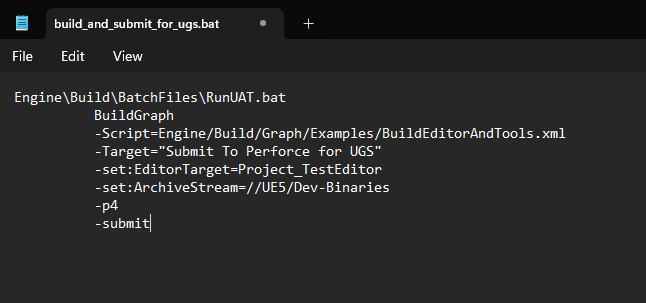
另外我们需要注意我们提交的这个流的名字是正确的 //UE5/Dev-Binaries,这里是之前创建的Dev-Binaries,专门用于存放预编译的二进制文件.
-set:ArchiveStream=//UE5/Dev-Binaries复制下方这个进行修改-上述仅供参考
@echo off
Engine\Build\BatchFiles\RunUAT.bat BuildGraph -Script=Engine/Build/Graph/Examples/BuildEditorAndTools.xml -Target="Submit To Perforce for UGS" -set:EditorTarget=Project_TestEditor -set:ArchiveStream=//UE5/Dev-Binaries -p4 -submit
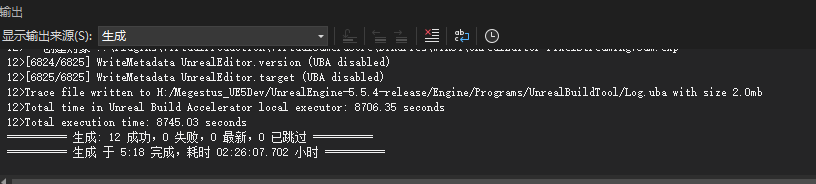
然后双击执行这个bat,开始编译。
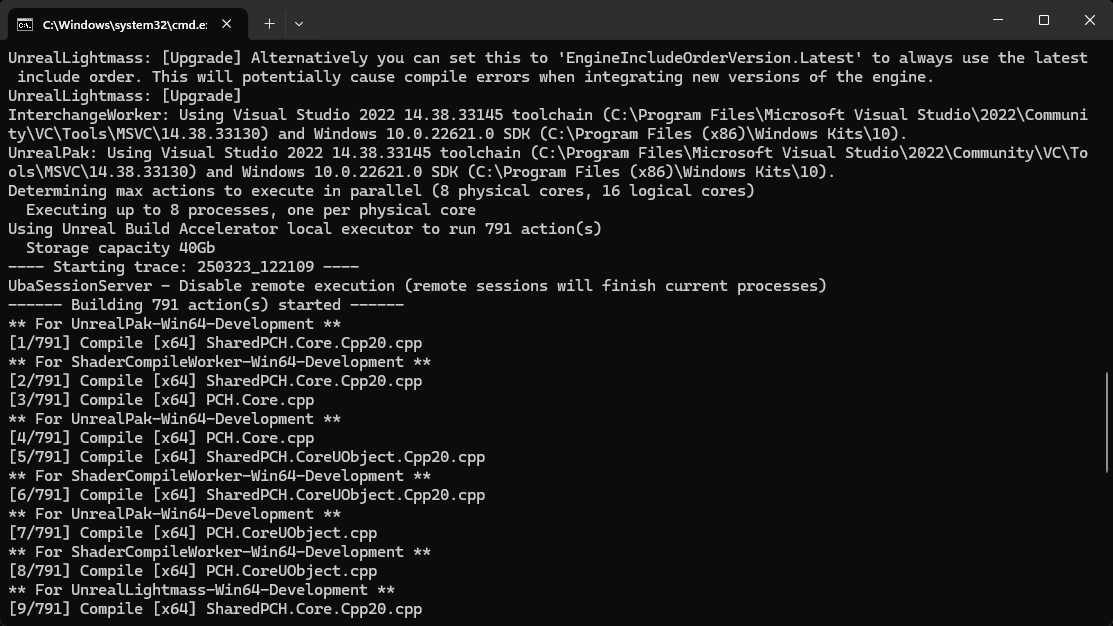
漫长的过程-大概两个半小时。
好像没看到二进制zip上传到P4...
Wip....
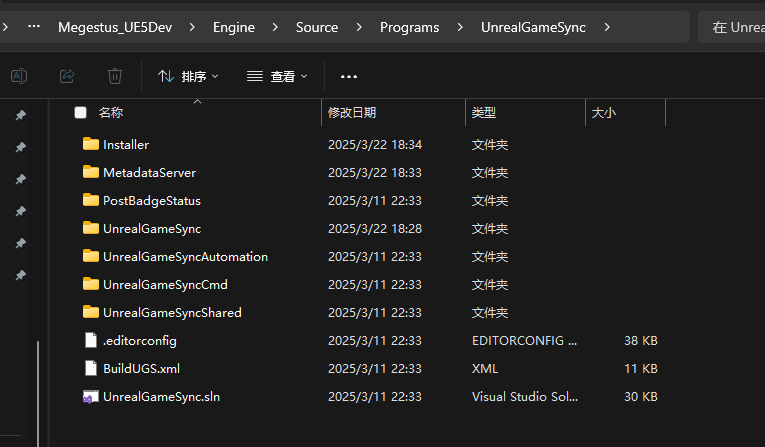
UGS预编译
\Engine\Source\Programs\UnrealGameSync
到这个目录下 运行UnrealGameSync.sln
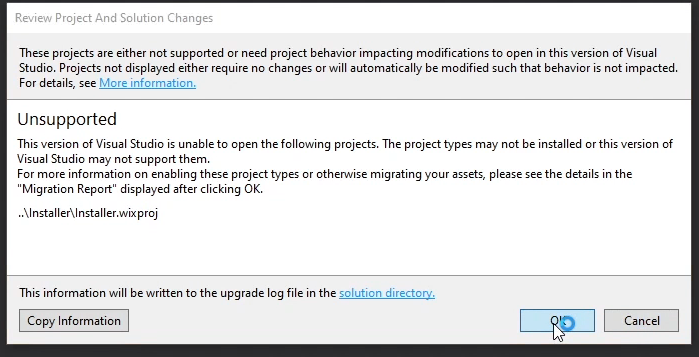
注意如果提示缺少 - wixproj ,那么就去官网下载并安装这个程序 WiX Toolset
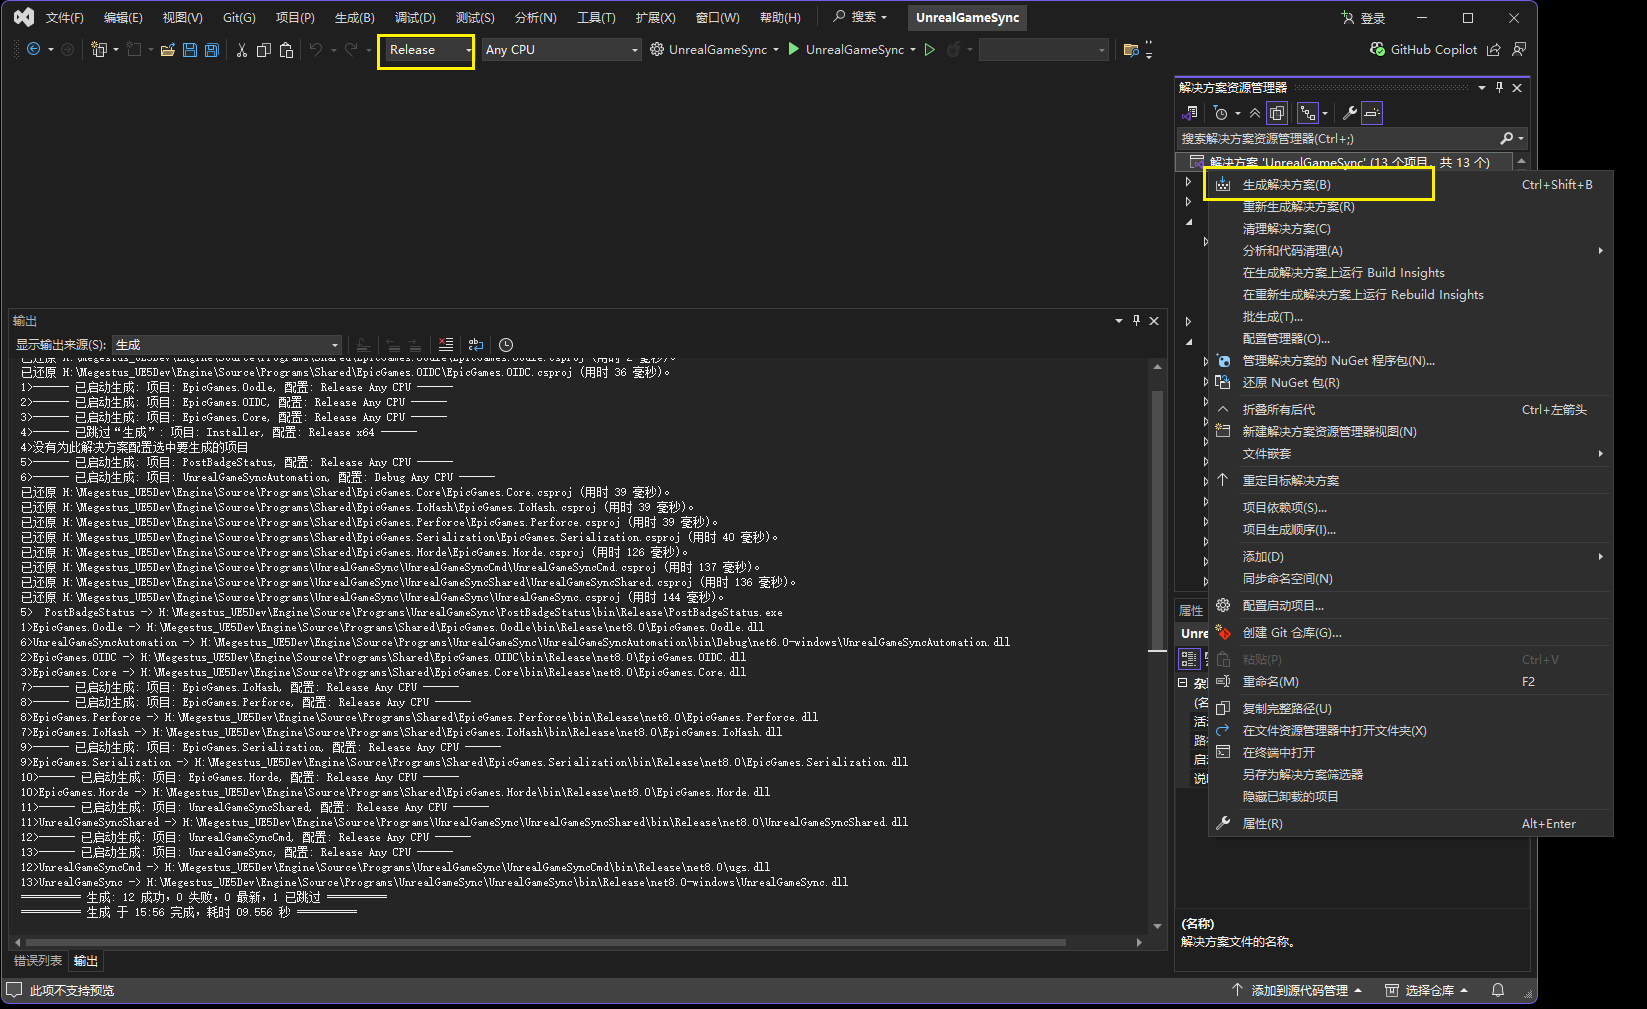
生成解决方案
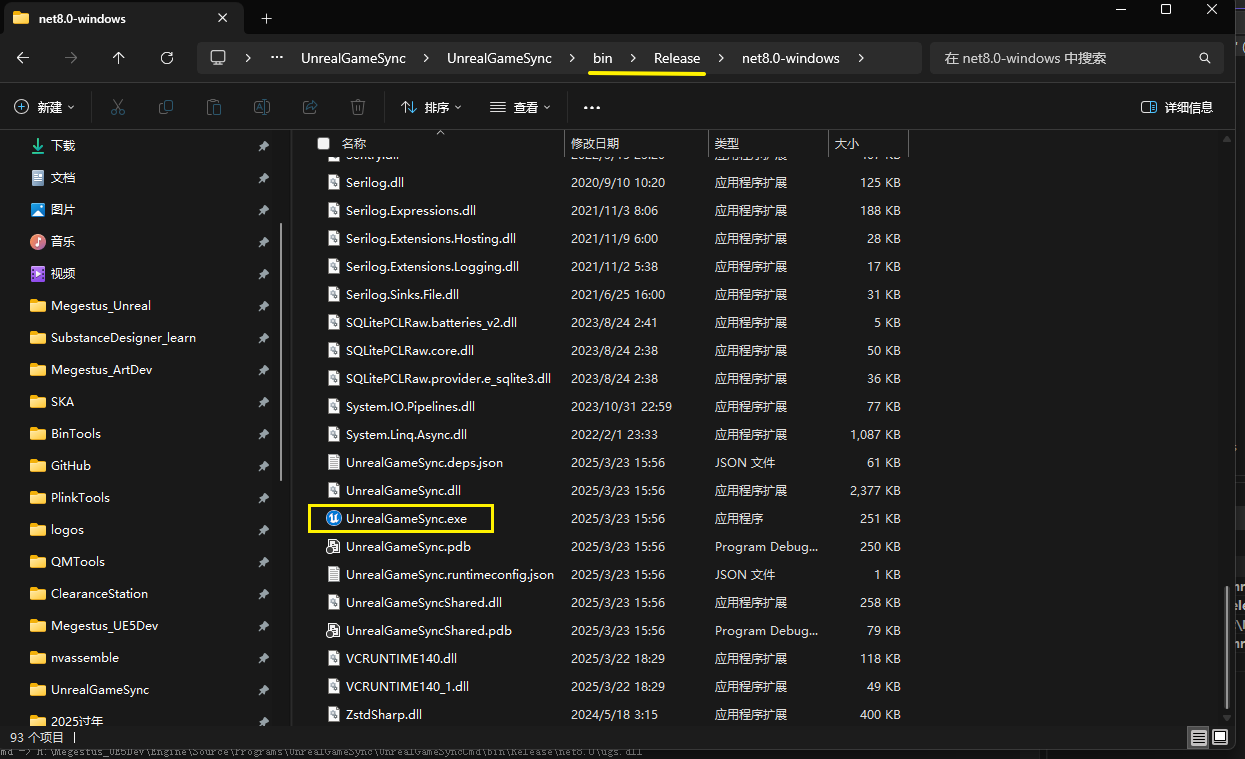
我们就能在\Engine\Source\Programs\UnrealGameSync\UnrealGameSync\bin\Release\net8.0-windows 下找到编译好的UGS
配置设置
Wip...
学习的文章和引用:
更新日志
c036b-于a79ab-于c6c5e-于67bb1-于bbdbb-于44c54-于3d56e-于77c0f-于